

A couple years ago George and I were hiking and we came across these beautiful seed pods. I loved the shape of the pod and the way the dried seed pods opened to expose the seeds inside. I took lots of photos and, as usual, uploaded them into my giant folder of plant photos.
This January I was trying to decide the subject for my next print and I had a vague memory that I had liked a seed pod from that walk. Sure enough, I found the photo deep in the depths of my computer and decided that this was my next subject. I didn't even know the name of the plant... although it is common around here. I emailed my botany friends and they told me it was an Illinois Bundle Flower, Desmanthus illinoensis. (Thank you Ken for the ID!). The plant is a member of the pea family, has compound leaves that are sensitive to touch, and has hallucinogenic properties. The shape of the plant also reminded me of a many-eyed feathered cherubim character in a Madeleine L'Engle book I read when I was little.
So that began my almost three-month journey working on a linocut of this plant. Part of the reason it has been such a long project is that I decided to depict the bundleflower using four colors. That means you either have to use four plates, or print one color and then continue carving the same plate, then print the next color, and carve again and so on. That is why it is called a "reduction cut."
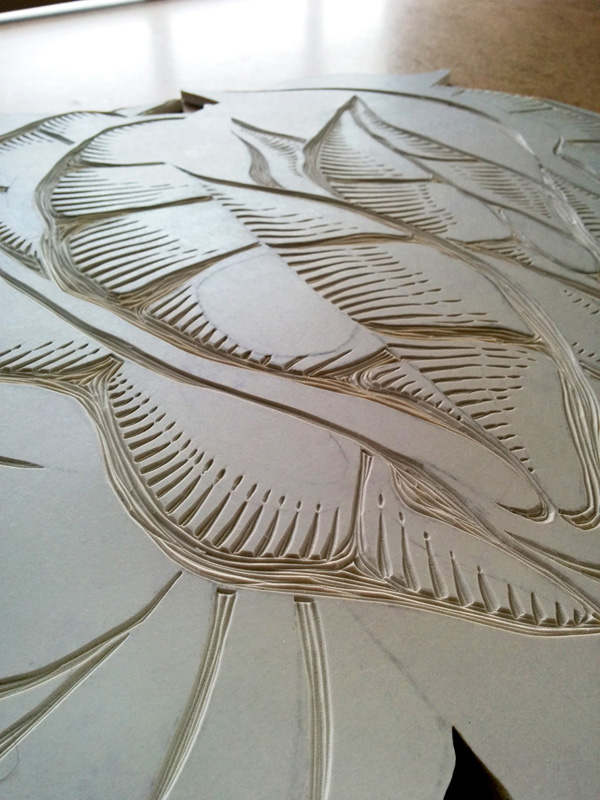
This post will show the first two colors. Below you can see both the plate and the prints for the cream and burnt orange colors.


The only sad part about doing a reduction cut is the plate is slowly destroyed along the way. I think that is why I took so many photos of the plate.


In the image below you can see my "helper" who either continually tries to hop on my lap while I am carving or paws under the door while I am printing. Here, he has mercifully taken a five-minute break as he was distracted by a squirrel.


The video below shows me rolling the ink onto the plate. It is fun to watch the image magically appear as the ink is rolled.


The most exciting moment comes after inking the plate, laying the paper down and burnishing, burnishing, burnishing. This video shows the big reveal.
I liked the plate at this stage so much I decided to buy more paper to print the plate before I destroyed it by carving more.
In my next blog post I will share photos of the plate after carving the next color. The final print is available at NessyPress.com.


No comments:
Post a Comment