Last week I was on my way downstairs to eat breakfast when George nonchalantly says,"I've got a Swainson's thrush in a box downstairs. It hit the window. Do you want to see it before I release it?"
Now, you have to understand we often have random injured birds in boxes so that was no surprise...but we don't often have a Swainson's thrush! So I got the camera, rushed downstairs and was soon standing in the driveway in my pjs taking photos.
When George opened the box to pick it up it made quite a fuss with loud, "I'm-totally-annoyed" chirps. But when he finally went to let it go it happily perched on his finger and looked quite content to sit there all day. George was worried it didn't want to fly so he put it back in the box to rest. An hour later he opened the box and it flew away no worse for wear. As my friend John would say, "Schweet!"
Wednesday, May 12, 2010
Monday, May 10, 2010
Bloodroot May
This month I was inspired by the lovely, curvy shapes of bloodroot leaves from the backyard. When I looked it up, again to my surprise it had an "M" class. So I could have called this month "Magnoliopsida May," but somehow "Bloodroot May" sounded better. (Sorry about the clashing greens of the wall and the calendar.)
Saturday, May 8, 2010
Crabapple Tree
The crabapple tree in our backyard is an amazing site to see in the spring and this year was a special treat because of our new screen porch. It was incredible to sit and listen to the thousand buzzing bees and watch them jumping from flower to flower.
Labels:
Crabapple tree photography
Monday, May 3, 2010
New Pillowcases!
This weekend I finally made pillowcases! I have had this fabric for a long time. I bought it because it goes perfectly with our bedroom color and it has birds and flowers on it! The color might not show up correctly on everyone's monitor, but it's between cornflower blue and dusty lavender.
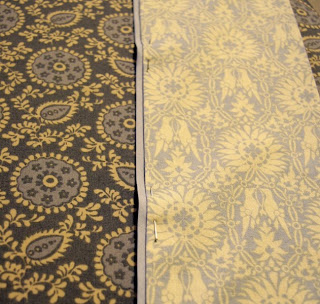
I used this blog tutorial to help me figure it out. But I had to adjust the size because we both like really wimpy pillows. I cut my fabric to 42''x 28.5'' for the main body fabric and 42''x 10'' for the edge fabric. I ended up using bias ribbon for the divider line fabric mostly because it was the only thing I could find in the correct color. But you could use fabric or ribbon. It is also best to finish your edges now with the zig zag stitch ( I don't have a serger).
I also altered the way she attached the edge fabric. My way hides all the seams. I made a diagram below.
Make sure to pin the bias ribbon only to the top layer first. It is important to get it even and straight here.
Then go back and pin the main body fabric. At this point you can pin through all the layers.
After sewing this together it's easy. Just fold with right sides inside and sew the edges.
Labels:
Sew Pillowcases
Subscribe to:
Comments (Atom)


