Wednesday, September 7, 2011
Hand-stamped Headboard
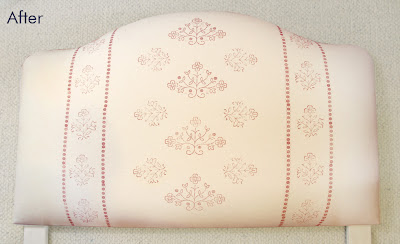
The headboard project is finally done! This past Saturday I spent the entire day stamping this project out. It took me longer than I expected to figure out all the spacing and it was a little nerve wracking to actually stamp on the headboard, but in the end it all worked out.
As you can see below I started with blank headboards I bought at Ballard Designs. At first my plan was to buy the headboard slipcovers that they sell just in case I messed it up. But in usual Nessy fashion I impetuously decided to stamp directly on the headboard itself. I did however, mock up several design options in Photoshop just to help me get the spacing and design just how I wanted it. If you don't have Photoshop I would recommend stamping a sample out on to craft paper first.
The other issue I had was that the stamp turned out much lighter than my test fabric. I was OK with the faded look because it gave it a vintage appearance. If you don't want that look I would recommend giving the area you are going to stamp a gentle cleaning with a damp cloth. (I had a small spot where my dirty fingers smudged the fabric so I spot cleaned it with Spray-N-wash and a damp towel and the ink appeared to take better in that spot.)
Another thing I learned is that stamping is not a project for perfectionists. Inevitably your dots won't line up perfectly or your stamp might be a little crooked. (Another tip - because of the irregular shape of the bunta blocks it is helpful to put a piece of tape on the back to help you line up North and South) But these little imperfections truly give it that hand-stamped appearance and from far away no one will even notice!
Overall I am very happy with the final result and now I can't stop thinking of the possibilities; I see hand stamped roman shades and curtains in my future! So get out there everyone and leave your stamp on this world! (OK, OK, I know but I couldn't resist.)
Subscribe to:
Post Comments (Atom)


No comments:
Post a Comment