Monday, April 4, 2022

Magnolia Woodcut: Carving


"It all started under the magnolia tree."
—Krittika Bhatta

INSPIRATION


Usually when I know I have a big project approaching I try and stay open for the universe to give me a nudge in the right direction.  Last October I was mulling over what I should make for my BIG INK woodcut when I came across a magnolia tree in Norwood that was covered with seed pods in every stage of development.  Some pods were still on the tree and had red seeds, and some had fallen to the ground and were in varying states of decay.  For years I have taken note of these pods here and there, but on this day everything came together.  I photographed the pods and collected a couple samples to bring home.
When I got home I poured through my photos and was specifically looking for something I could use for the BIG INK.  The BIG INK was started by Lyell Castonguay and Carand Burnet to inspire greater public appreciation of large-scale woodblock printmaking. They travel the country with their giant press printing local artists' woodblocks.  The only caveat is, the print must be a black and white image and at least 24'' by 36''. 

I hesitated to choose the magnolia because I always thought if I depict a magnolia it should include those bright, luscious red seeds.  I was torn between finding a new subject or just proceeding with the magnolia.  I played around with the image and made it black and white.  

“To see in color is a delight for the eye
but to see in black and white is a delight for the soul.”
 Andri Cauldwell

When I saw the pod without color, I knew this was it.  There was so much awesomeness going on in this pod, it didn't need the red seeds. 

SKETCH

I began by printing my photo to the size of my woodcut and doing a light tracing.  At that point I stood back and moved things around until I liked the composition.  Below you can see the pencil drawing from the early stage to finish.  


As I was writing this blog post I finished one of my notebooks in which I write work notes.  As I was flipping through it I found this description of a dream I had the day after I finished this sketch:

"When I woke up this morning I got a two-second glimpse into a dream I had last night.  I dreamt about a piece I am working on depicting a magnolia seed pod.  In the dream I was traveling along the mountains and valleys of the piece.  It was exhilarating and felt like pure love... pure joy."


PAINT WOOD

Before transferring the drawing to the plate, Lyell (of the BIG INK) recommended painting the wood plate a neutral color.  The contrast between the paint and wood color helps the carver to better see their design.  This video shows me painting the plate blue. (Music: La Vieja by Las Sirenas del Son)


I had a moment of freak out when I came down to the studio the day after painting.  The plate had warped A LOT.  I ended up wetting the back side and pressing with jars of rocks (you never know when your rock-hoarding habit will come in handy!)
The water helped quite a bit.  My wood-working friend Mark said I should have painted both sides to begin with.

TRANSFER

Once the paint dried, I transferred my drawing to the plate using carbon paper.  The blue does make it harder to see the pencil lines, but easy to see the carved marks.

CARVING

I am always a little nervous to make the first cuts into the block, but I was pleased how this first tendril emerged.


Here you can see the drawing next to the carving, plus my Flexcut gouges and sharpening strop.


My basement studio was cold this January and my friend Jenny gave me this cat hat.  It isn't my usual style, but it quickly became my carving hat.


This video shows me carving what I call the "gills" which was really the papery covering of the seeds.  My cat Otus was hungry and makes an appearance to let me know it was lunch time. (Music: El Buscapies, Andres Flores and Amigos Project) 


Every day I would vacuum all the wood chips, but inevitably I spread them throughout the house and am still finding them everywhere.


As you can see below, I had to scan and flip my pencil drawing so I could use it as a guide for carving.


The photo below shows the carving and flipped sketch about halfway through.


In this video I clear a large portion of the bottom right hand corner and it is satisfying to watch it sped up.  This is probably about 60-80 minutes of carving condensed into 60 seconds.  (Music: The Treasure Map by Fabien Tell)


Bubo also came down everyday to check on my progress and cause trouble.


I was excited and so thankful to receive the Speedball Art Alumni Scholarship that covered my entry fee to the BIG INK.  This allowed me to splurge and purchase a Japanese Sankaku To (v-gouge).  It was so sharp I cut something off that I shouldn't have the first time I used it. 


One day Otus came down and I thought I would get a photo to show the scale of the plate.  But Otus is such a big cat he made the plate look small!


Right before I carved a section I would usually darken my pencil lines. Below you can see a darkened tendril.


This video shows me finishing the carving, except for the stem.  It was an exciting day for me.
(Music by La Molienda, El Toro Rabón)


I love how the wood looks like waves in the open expanses.


"Every ripple on the ocean
Every leaf on every tree
Every sand dune in the desert
Every power we never see
There is a deeper wave than this
Swelling in the world
There is a deeper wave than this"
—Gordon Sumner, Songwriter


This video shows the very last day of carving the stem.
(Music: Single Moment, by RomanBelov, Pixabay) 


"FREEING THE TENDRILS"

I call the final step, "Freeing the Tendrils".  It entailed cutting  the excess wood away from any tendrils that extended beyond the border. The last time I did the BIG INK I borrowed my friend Mark's Japanese razor saw; this year I figured it was time to buy my own.


Of course, I should have done this step the first day before I put in weeks of carving.  But I left it for the last step and I was VERY anxious about it.  Especially because I am not the world's best saw-er.  The video is sped up so much you can't see when I get the saw stuck in the wood numerous times. (Music: Stepping Up by Tiki Tiki)  


The photo below shows the "freed" tendril.


REPAIR

I made a fair number of carving mistakes throughout the project.  This video shows how I repaired the most common type of mistake...carving through a line.  It is a simple repair made with glue and is possible if you have the "missing" piece.


The photo below shows an example of a "Kwikwood" repair.  This type of repair is necessary when you carve away wood and you don't have the missing pieces.  On the second day of the project, I accidentally carved through my top border (cringe!).  The Kwikwood filler is a two-part "chemical" wood putty that you mix between your fingers and then smear into the offending space.  Lyell (of BIG INK) recommended it and it worked wonderfully.


FINAL CARVING


I took a photo at the end of carving every day. (I wasn't going to do it this time because it is a pain to clean every day, but my friend urged me to do it...thank you Tiffany.) This video shows the daily progression and it is so fun to see the magnolia "growing" over time. (Music: The Olympic Team by Philip Ayers)


CONCLUSION


Truly, the FINAL step was to deepen all the spaces.  I ended up carving until the very last day trying to remove any high spots that might catch ink as the brayer rolls over it.  Some people include these "chatter" marks in their design, but I usually carve them away.  It is a matter of choice.  During the BIG INK you can put tape over areas that catch ink where you don't want it, but it can be time consuming. Lyell recommended carving to a depth of an eighth inch for white areas.  As you can see below I almost carved as deep as a quarter inch in places.


As I was deepening the spaces, it dawned on me this process is simultaneously occurring in my life.  Just like high spots on my plate might catch ink, I have been very aware of the places in my life where I get snagged by "negative" emotions (like anger).  At first I was tempted to follow the analogy to its logical conclusion...  that we need to clear away anything that "sticks up" and might "catch ink."  But if you continue down that line of thinking we would clear away everything on the plate and be left with nothing.  The questions arose, "But what about the design?"  "What about the person?"  "Do we really want a bunch of blank canvas, emotionless zombies walking around?"  From one point of view, "realizing you are nothingness" is a valid goal (and I am not implying you are a zombie if you have had this realization.)  However, I felt this analogy was pointing at something else. 


After pondering this, it came to me that it isn't that we need to go and cut those places out...it is that these places need extra attention.  They are signals that we need to tend to this area and see if this is where we want the ink to "catch."  Because the "ink catching" isn't a negative...it is what creates the design.  

"If our emphasis is to eradicate the unwanted material from our systems as quickly as possible,
we sacrifice powerful opportunities for self-awareness." 
 Matt Licata

I wasn't sure where this analogy was taking me and felt there might be more to it.  So one day I went for a walk and put the question out to the universe.  In the middle of my walk, the thought came to me that "We are both the design and all the spaces in between.  We are the hills and the valleys, the negative and the positive."  It is up to us to decide what we want the design to be... to be aware where the ink is catching and consciously decide if that is what we want.  To see that life is a play between the dark and the light and that is where the beauty lies.  

In Tantrism, we throw our entire beings in, endlessly, without distinguishing between pure and impure, beauty and ugliness, good and bad.  All the pairs of opposites are dissolved in the divine.  The deepest urges, the most sublime capacities – no one lacks them.  We begin to communicate with the divine when we totally accept the complete spectrum of our thoughts and emotions.  All beauty contains darkness. 
⁠— Daniel Odier


To see this plate printed visit my next blog post: Magnolia Woodcut: BIG INK
To see the final print visit: Magnolia Woodcut: Final Print

Sunday, December 19, 2021

"Berries" Linocut


"What will come from the briar but the berry."  — Irish Proverb

●●●●●

Willy Wonka:
The strawberries taste like strawberries. The snozzberries taste like snozzberries!

Veruca Salt: Snozzberries? Who ever heard of a snozzberry?
[Wonka grabs Veruca's jaw]

Willy Wonka: We are the music makers... and we are the dreamers of dreams.

— Roald Dahl, Charlie and the Chocolate Factory

●●●●●

INSPIRATION

I told myself last year I wasn't going to do a Christmas card this year unless I had purchased a press.  Well, I didn't have a press come late November and I had to decide whether or not to do it.  I looked through my designs from years past and the alternate designs that never came to fruition.  The only one that appealed to me was a two-color idea, but I knew with the high quantity it would be too much.  So I decided to let it go a few days and see if any one-color ideas came to me. 

“There’s no earthly way of knowing which direction we are going.” — Willy Wonka
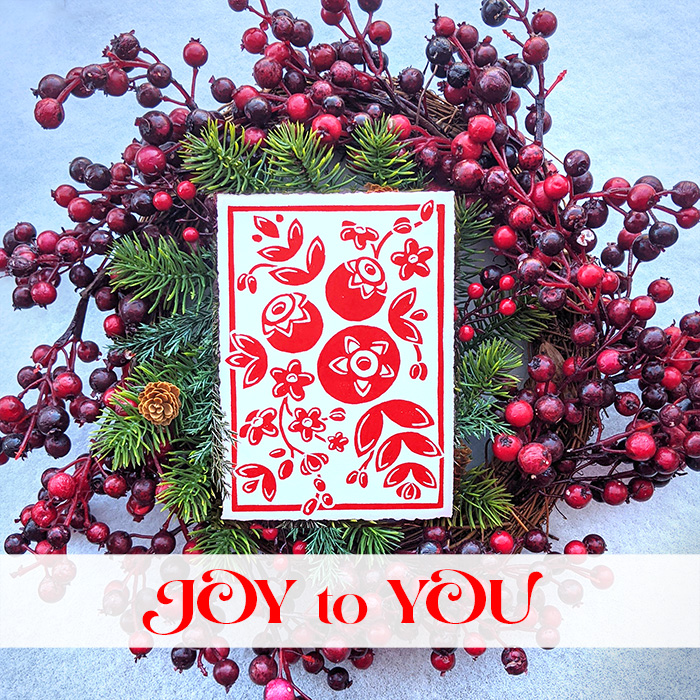
A couple days later I was coming in from the back porch and I spied a vintage tray that I bought a few years ago from my friend Sarah.  It was super faded, but the idea came that I should do a simple, red and white folk floral design.

SKETCH, ILLUSTRATOR, TRANSFER

I began with a quick pencil sketch.  I don't always re-draw my sketches in Illustrator, but I knew this sketch needed a bit more work.  Below you can see how I altered the sketch once I traced it in Illustrator.


In the past if I began with a computer printout, I have simply scribbled the back with pencil and traced the design to transfer to the block.  But I figured there had to be a more precise way.  So I watched several YouTube videos about how to transfer a laser printout using acetone.  In the video I watched, the person used a black printout. However, I had already printed my design in red and I was antsy to try it.

“Stop. Don’t. Come back.” — Willy Wonka

I forged ahead using my red printout and after rubbing the back of my paper with the acetone I was sure the experiment had failed.  The paper was shredding and at first, it didn't seem like the design transferred.


But after a little more rubbing I could still see a faint yellow outline of my design.


“Invention is 93% perspiration 6% inspiration 3% perspiration and 2% butter scotch ripple.”
— Willy Wonka

The whole right side didn't transfer so I re-drew that part on the plate.  As you can see above, I used a ruler to recreate the right border, eye-balling it the best I could.


Once I finished carving, I again used acetone to clean the plate of the remaining ink.


This video shows the entire process set to Jingle Bells (Music by ZakharValaha from Pixabay).


TEARING PAPER

My Christmas list has grown quite a bit over the years and I knew I needed at least 136 cards.  I bought my favorite Stonehenge paper and each sheet gave me 18, so I tore 8 sheets.  People always ask why I tear the paper instead of cutting it and it is because printmaking paper gives a beautiful deckled edge when torn.  It took me about 3 1/2 hours to tear the paper down to size (probably would have taken me the same amount of time to cut it).


PRINTING

“When the time comes for you to make a change or to grow,
the universe will make you so uncomfortable you will eventually have no choice.”
— Iyanla Vanzant

I normally would never tear paper the same day of printing because it is simply too much. But I was worried about having time for the prints to dry after my never-drying "Pigsqueak" experience this summer.  So after dinner I went down to pull a test print. (Music by Lesfm from Pixabay)


It makes me laugh watching the video now because it seems so idyllic and cheery.  Nothing could have been further from the truth that night.  That is because I spent a lot of time meticulously measuring 1/4 inch out from the plate and carefully marking it so I would know where to place the paper.  When I put my test paper down, the plate barely fit on my perfectly-torn paper!   How could this happen, you ask, when I did an acetone transfer? Well, remember when I said the right half of the transfer didn't work so I just eye-balled it?  I guess I didn't eye-ball it square and the plate ended up skewed. 

"What is this, a freak out?"
— Violet Beauregarde

Needless to say I wasn't very happy about it.  In fact, I had a mini-meltdown and was ready to throw the towel in.  I tried stretching the plate.  In desperation I grabbed a pair of scissors and frantically cut a jaggedy hole around the plate so I could tape the plate directly to the table to compensate for the skew.

“Well, fortunately, small boys are extremely springy and elastic.
So I think we’ll put him in my special taffy-pulling machine.
That should do the trick.”
— Willy Wonka

This did not work.  Tape is no solution for a skewed plate.  In the end I glumly recognized the only way to proceed was to have perfect registration on every single print. 

“Impossible, my dear lady! That’s absurd! Unthinkable!”
— Willy Wonka


To help me register the paper, I used a piece of wood taped to the table.  Because of the skew, the right side had to be higher than the left.  I quickly realized the blue tape allowed my wood guide to move too much.  Plus, in order to apply enough ink at the bottom of the plate, I had to move the wood away every time.  In the end I left it attached on the right side and flipped it away for inking.  I then flipped it back for placing paper, using the edge of the plate as a guide.  I just had to concentrate really hard every time to place the wood and paper very slightly higher on the right.

“No other factory in the world mixes its chocolate by waterfall…
But it’s the only way if you want it just right.”
— Willy Wonka

It actually worked surprisingly well until about 80 prints in when I started printing off the edge.  The plate, which was double-sided-taped to the table, had slowly moved to the right from all the burnishing.  I adjusted my technique and we were back in business.  I probably only lost a handful to printing off the edge.

“I don’t understand it. The children are disappearing like rabbits.
Well, we still have each other. Shall we press on?”
— Willy Wonka

In addition to my skewed plate woes, the plate kept giving me fuzzy edges.  For two days we had fuzzy-edged prints.  It is really disheartening to put your all into something and not get the results you would like. I finally had the idea to stop using the baren and only use the wooden spoon (instead of both).  It helped.  Sometimes it takes time to figure out the best way to print a plate.


We printed for three hours every day for five days.  I usually like to power through to save on clean-up, but I was physically spent after each printing session.  In the end, it took us 15 hours to print 154 prints (I tore some extra paper).  That's almost 6 minutes per print.  


“A jug fills drop by drop.” – Buddha


Violet Beauregarde:
 I'm a gum chewer mostly, but when I heard about these ticket things, I laid off the gum; switched to candy bars.
Mrs. Beauregarde: She's just a driven young women. I don't know where she gets it.

DRYING

After a week of drying in the basement I thought the prints were dry because I added a cobalt siccative.  So, if you receive one of these prints, please do not lick them (this is NOT lickable wallpaper); it is bad for you to ingest!

 I stacked the best twenty prints and brought them upstairs to sign and number.  When I unstacked them, I realized the prints weren't quite dry because many of them printed themselves onto the backs of the print above.  It was an extremely stressful moment as I realized I might have ruined twenty prints!  After carefully unstacking them I found the tops were not smudged. I felt extremely lucky that none of them were ruined.  I was hoping not to have to do this, but I brought all the prints up from the basement and placed them around the house on the radiators. It is always a risk to carry wet prints through a house of cats and cat hair.


"Cat hair is my glitter" – Unknown


“Hm… well, I think that furnace is only lit every other day,
so they have a good sporting chance, haven’t they?”
— Willy Wonka

I can tell when a project is pushing me to my limits because I stop taking photos.  I normally would have taken a photo of the touching-up, numbering and signing, but I was starting to feel desperate to finish.  It took me two days to do this part.  

ADDRESSING

Some times I need a break from the printing part of the process, so I procrastinate by designing custom stickers.  This year I made a matching berry return label and berry joy sticker for the back.  Each letter received four stickers: a custom berry return address, an address, a stamp, and a berry joy stamp.
In years past, magical elf (and husband) George helped with the addressing and label-sticking part of the project.  But this year he was only able to help do the return addresses because he went to Costa Rica to visit the jungle gnomes (smart man!).
“Of course they're real people. They're Oompa-Loompas...Imported direct from Loompaland...And oh what a terrible country it is! Nothing but thick jungles infested by the most dangerous beasts in the world - hornswogglers and snozzwangers and those terrible wicked whangdoodles. A whangdoodle would eat ten Oompa-Loompas for breakfast and come galloping back for a second helping.” — Willy Wonka
POEM

The past couple years we have been including a poem with each card. This year's included a sliver of my bedroom "pandemic" sketch (you can read more about that here).  

CONCLUSION

It happens every time, they all become blueberries. —Willy Wonka

In case you missed it in the poem, I decided this was the last year to send hand-printed cards.  It may not have helped to be writing the poem after long, difficult days of printing.  But I had been on the verge of that decision before even starting the cards this year.  

I am not one who easily embraces change.  One time our neighbor came over and re-arranged the furniture (he is very skilled at it!).  I could hardly stand it a day before I had to move it right back.  Sometimes I think we need to be very uncomfortable before we make changes... and this year the universe made printing the cards excruciating.

I know there are a variety of ways I could make it easier.  I could shorten our list and make fewer cards.  I could get a press.  I could make a few prints and then send digital copies of the print (or make digital prints to begin with).  I could also take a break from Christmas cards.  I want to make choices for myself that are filled with more joy and less self-flagellation.  I know that sounds obvious, but my actions speak for themselves.  Somehow all my projects "turn into blueberries."  They become giant and need to be rolled into the juicing room to be squeezed.  (And I've twisted myself into a pretzel shape and turned blue by the end.)   I don't know what will happen next year, but I do know for sure that something needs to change.  Sometimes that is where we have to start... just recognizing the simple desire for change. 

“If your compassion does not include yourself, it is incomplete.” – Buddha

The other thing I know for sure is that I love spreading joy.  I like to envision each person who receives this card smiling when they see the joy sticker on the back, delighting in their handmade print, and chuckling when they read the poem.  It is my hope the future holds joy for you and joy for me.  I wish each and every one of you a holiday filled with snozzberry pie.  And I was going to say, "I hope we can all give up chewing gum for chocolate to find our golden tickets in the New Year."  But perhaps the better analogy would be to say I hope we spend our precious energy on buying one "scrumdiddlyumptious bar" for ourselves and one for Grandpa Jo.  May your New Year be filled with peace and may you live in happiness too... like the Oompa-Loopa doopadee do!


Willy Wonka: [to Oompa Loompa] I want you to roll Miss Beauregarde into the boat and take her along to the Juicing Room at once. Okay?

Mrs. Beauregarde: The Juicing Room? What are they gonna do to her there?

Willy Wonka: Oh, they're gonna squeeze her. Like a little pimple. We've gotta squeeze all that juice out of her immediately.

[Mrs. Beauregarde gasps]
[Mrs. Beauregarde runs up to Blueberry Violet, who is stuck in the door]

Blueberry Violet: Mother, help me. Please!

[Mrs. Beauregarde helps Oompa Loompas push Blueberry Violet through door]

Violet Beauregarde: [after stretching into a pretzel shape] Look mother, I'm much more flexible now.

Mrs. Beauregarde: [disapprovingly] Yes, but you're blue.

— Roald Dahl, Charlie and the Chocolate Factory